- 学习ZigBee不仅仅是学习控制器本身,还要掌握一堆叫做协议栈的代码和网络的一些相关东西
ZigBee是无线设备之间的一种通信方式,类似于任人和人之间的普通话交流,普通话就是一种通信方式
ZigBee,ZigBee通信方式,ZigBee协议这三者没任何区别,只是说法不同而已
ZigBee的作用就是用于无线模块和模块之间的通信,构建无线局域网
无线传感网络:如果这个无线局域网用于传感器的数据收集和监控,那么这个网络就叫做无线传感器网络,是无线局域网的一种具体应用
引入ZigBee通信方式的原因:
- WiFi:通信速率大,功耗大等
- 蓝牙:功耗小,组网的节点数较少
- ZigBee:可以组件大规模的网络,功耗低(TI CC2530 正常工作电流8mA,最低工作达到几个uA),缺点为通信速率小,MAX=250KB
此次使用的是CC2530芯片
环境的安装和搭建
工作环境IAR的安装:
下载链接,提取码:vbzy
使用注册工具激活:
下载链接,提取码:2c5p
注意:Win7以上的系统激活的时候需要右键以管理员方式运行软件,否则会在后面的编译代码的过程中出现错误,详见链接
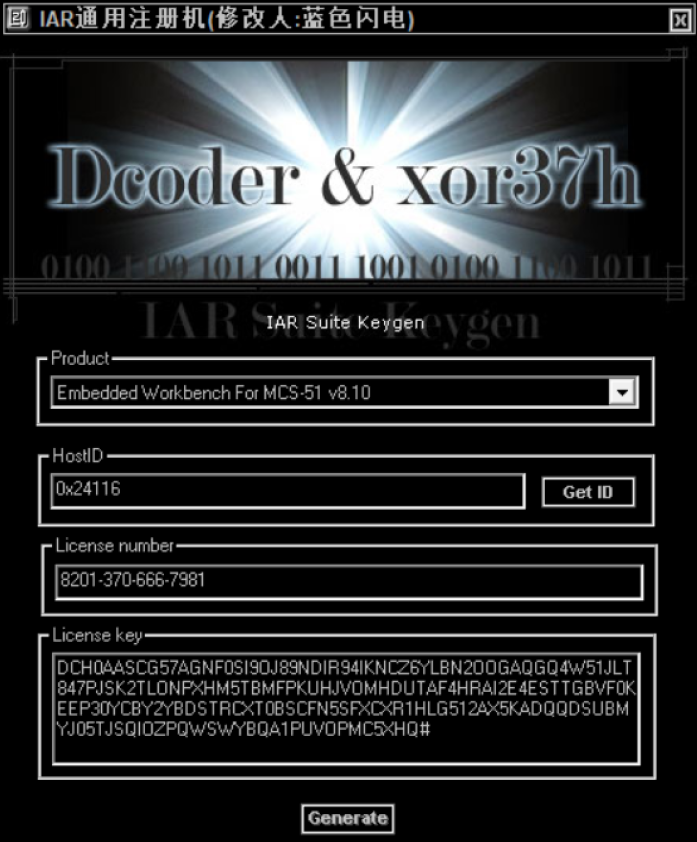

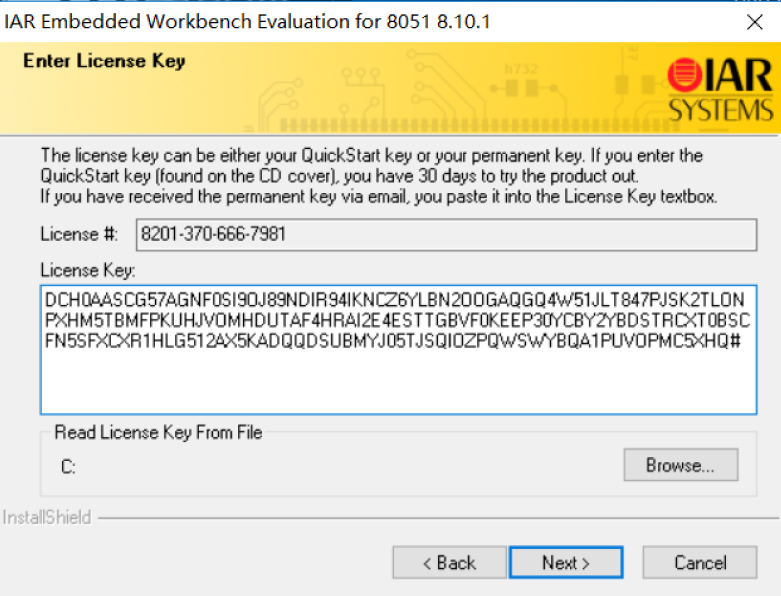
如图所示激活操作,其余操作只需next即可
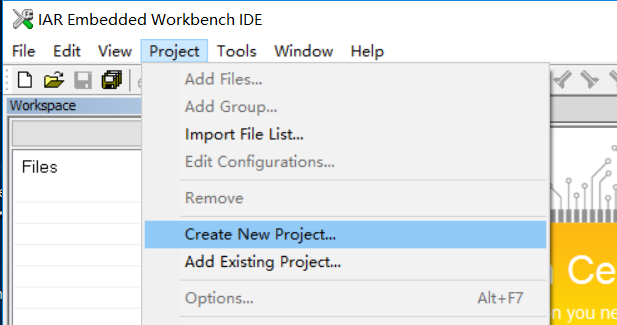
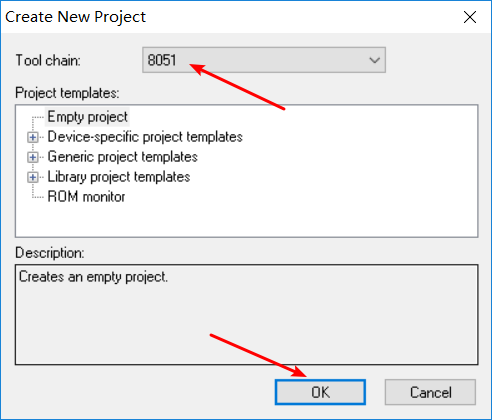
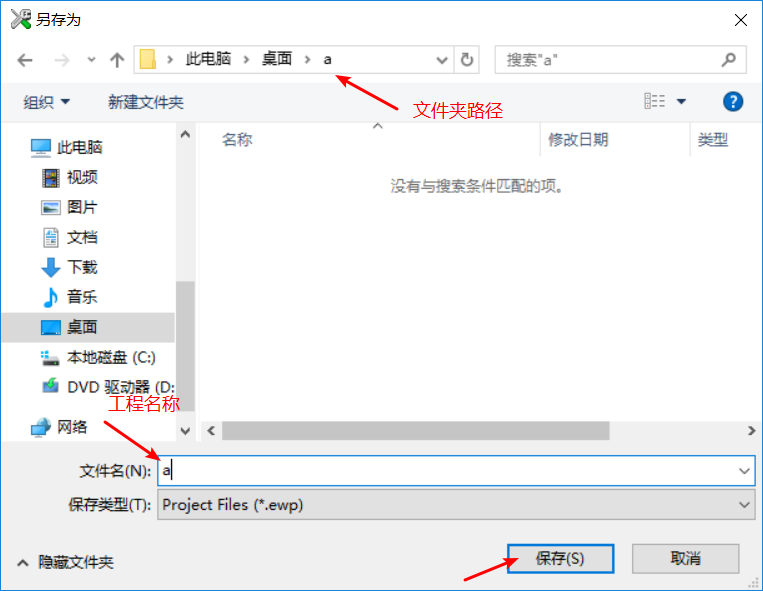
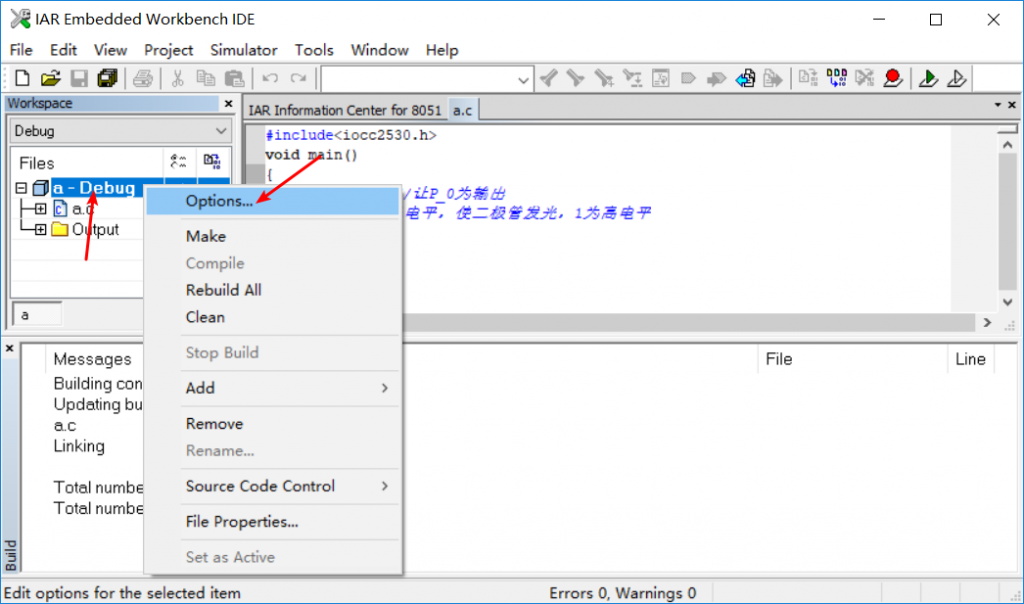
新建工程文件
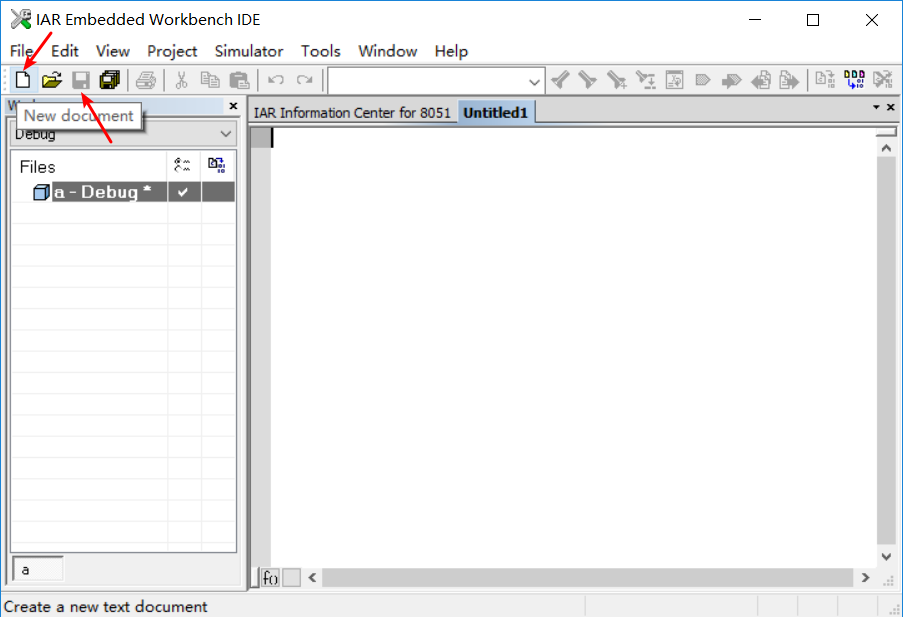
C语言.c文件建立与保存

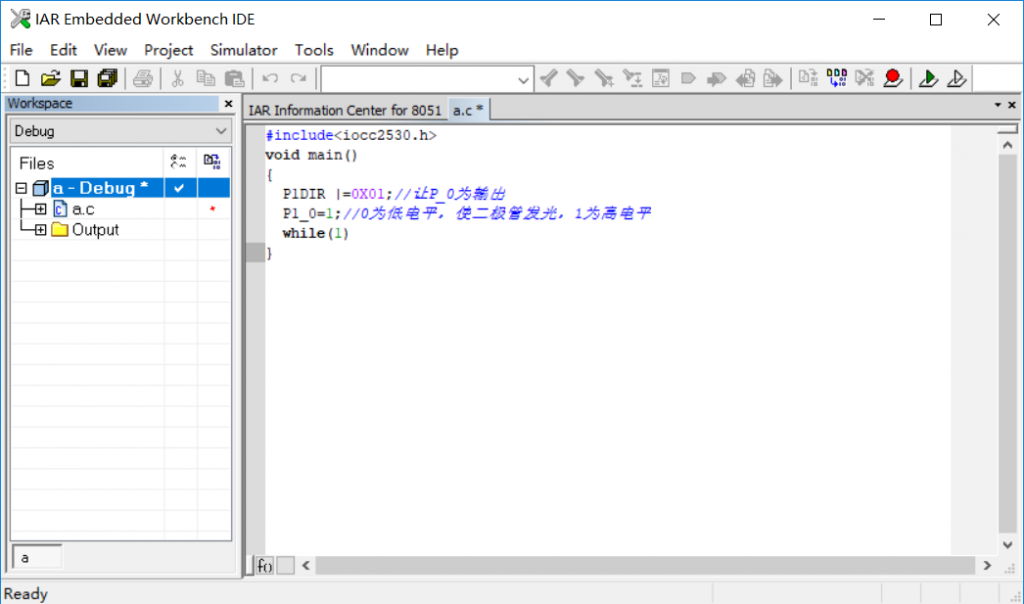
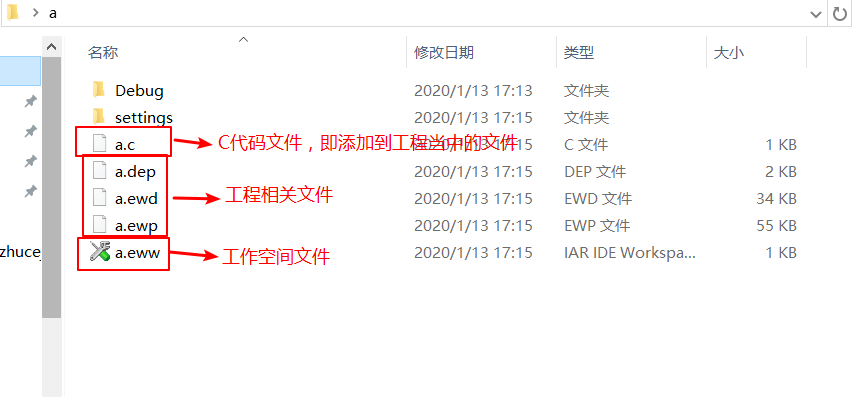
将文件添加到工程中:

写入代码:
#include<iocc2530.h>
void main()
{
  P1DIR |=0X01;//让P_0为输出
  P1_0=1;//0为低电平,使二极管发光,1为高电平
  while(1);
}
点击编译:

在弹出的框框中给工程工作空间命名:
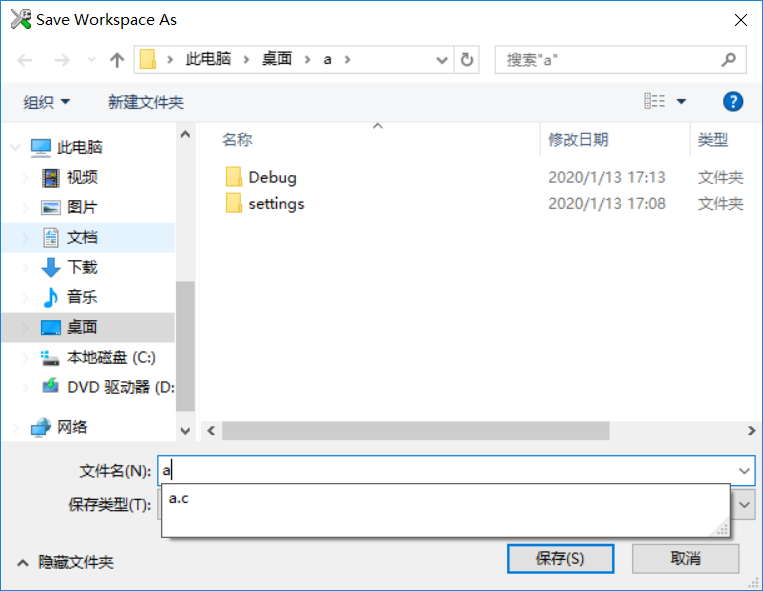
保存,编译通过

以下为工程目录中各文件的介绍:
ZigBee仿真器
仿真与下载程序用到的一种硬件
需啊在Windows环境下安装驱动才可以使用
驱动下载链接,提取码:3gbw
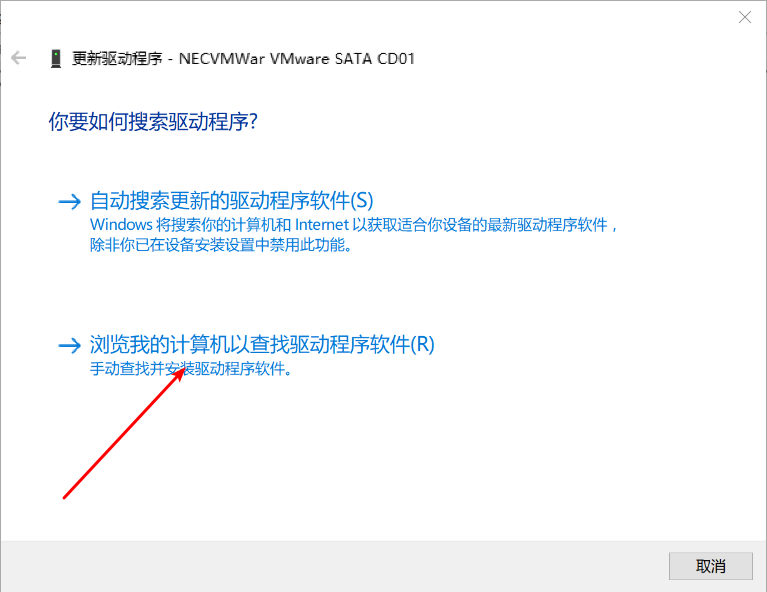
在电脑USB端口插上仿真器,打开设备管理器,右键新加进来的前面有黄色感叹号的标致,点击更新驱动
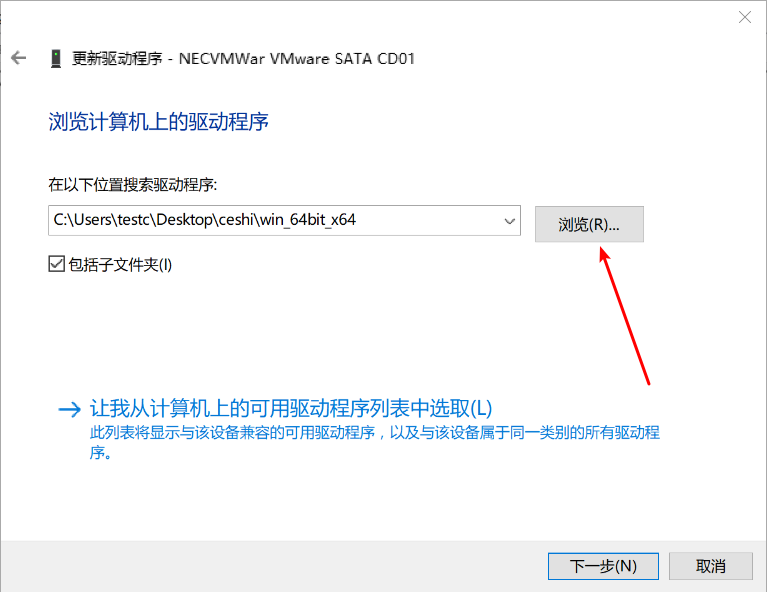
点击浏览定位到驱动文件夹,随后下一步安装即可
随后进行下载操作(即将程序下载到板子里)
下载前的配置操作
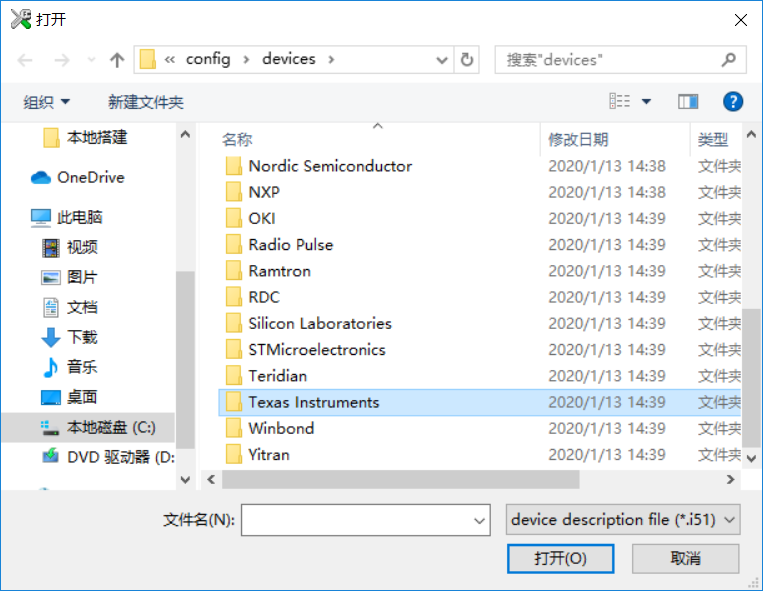
器件选择:
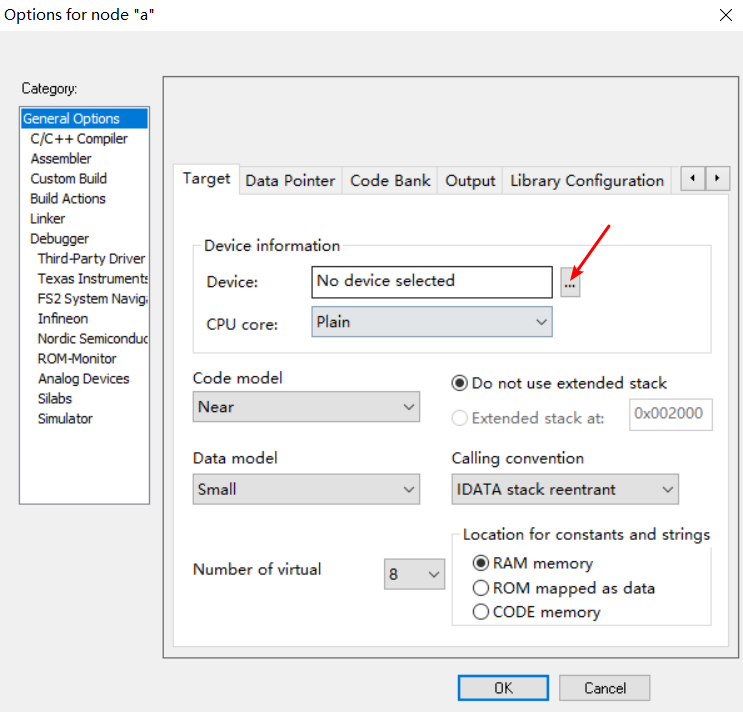
点击后弹出一个文件夹,此文件夹在IAR软件的安装目录下
选择–>Texas Instruments–>CC2530F256,打开即可

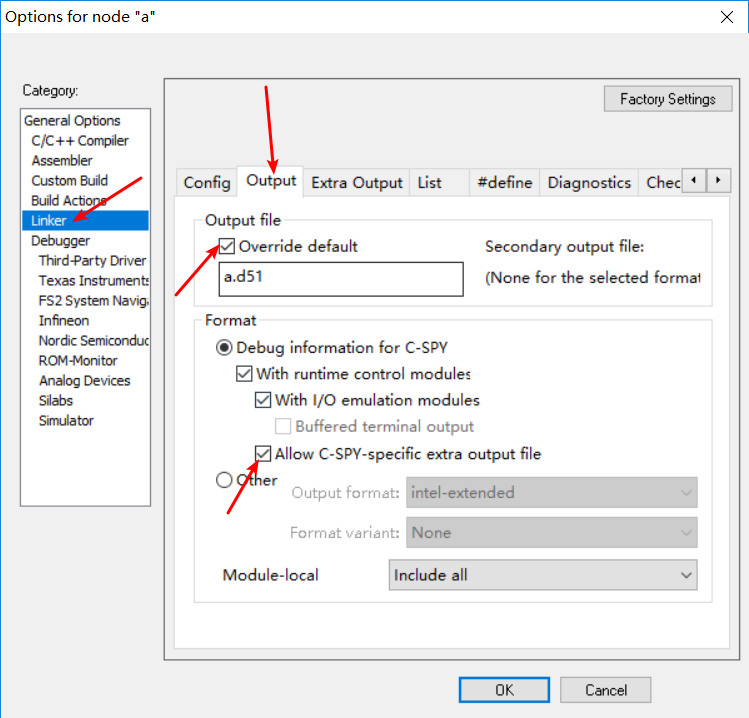
Linker连接配置:
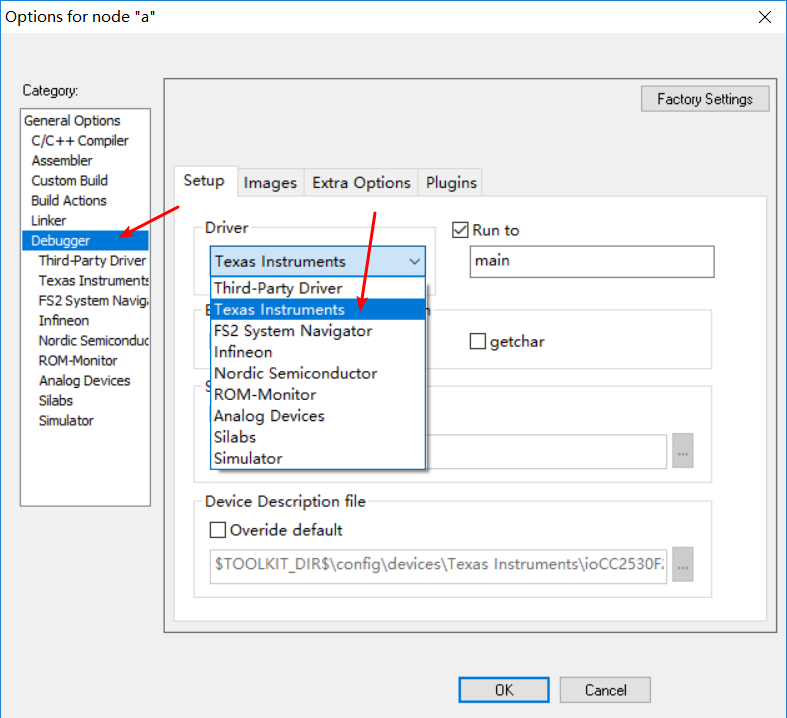
Debugger选择:
点击OK后即可下载到板子中
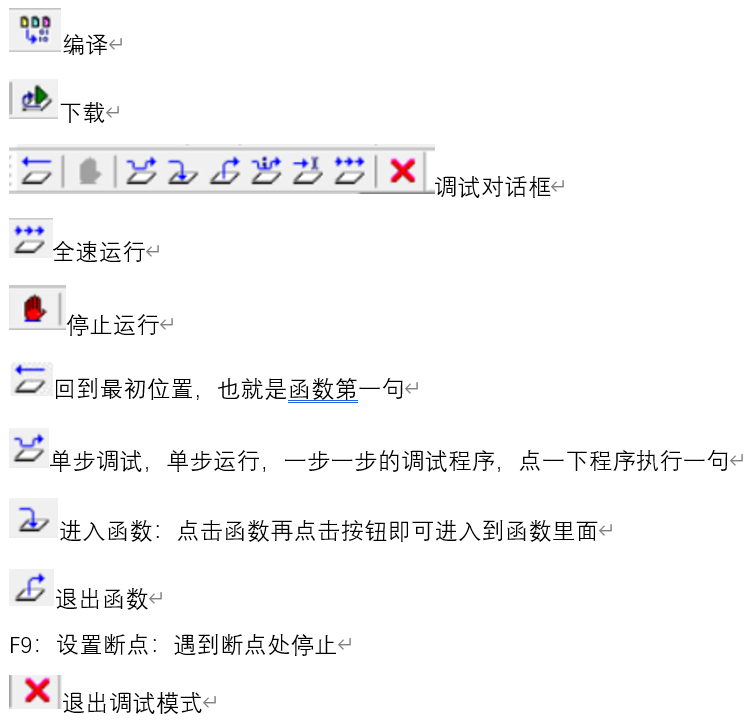
点击顺序如下:

以下为各个图标所代表的含义:
导出为Hex镜像文件供他人使用
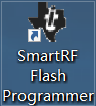
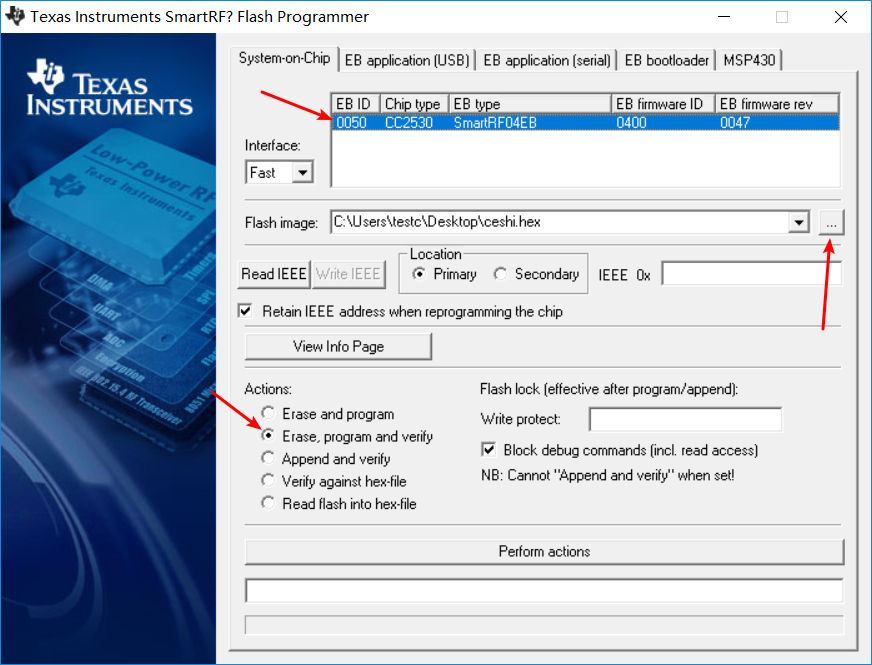
需要用到SmartRF flash programmer这款软件
下载链接,提取码:n4br
点击安装即可,安装完成后桌面会出现以下图标,点击即可打开应用
另外需要在IAR中导出后缀为.Hex的文件
在输入框中输入你想命名的.Hex文件(注:格式为文件名+.hex)
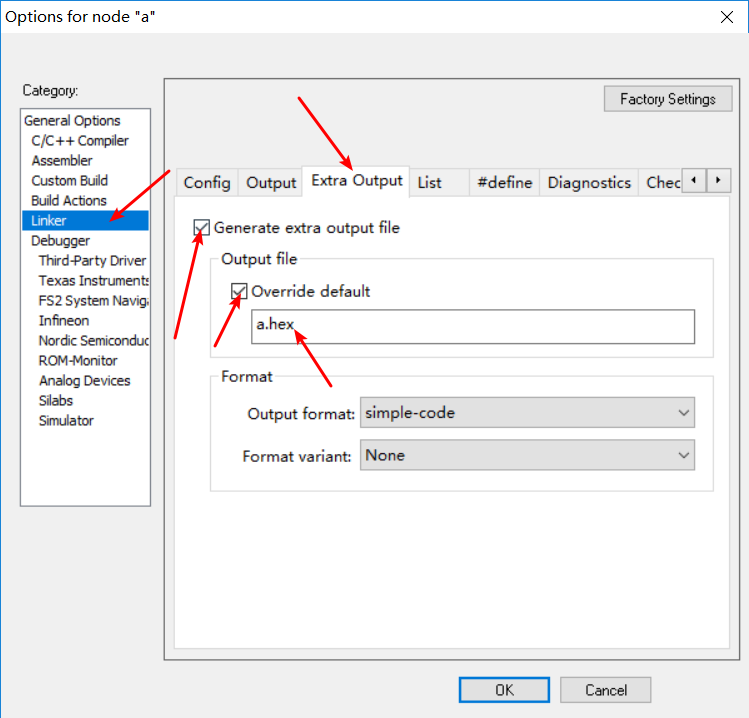
另外在Output format处选择intel-extended,OK即可
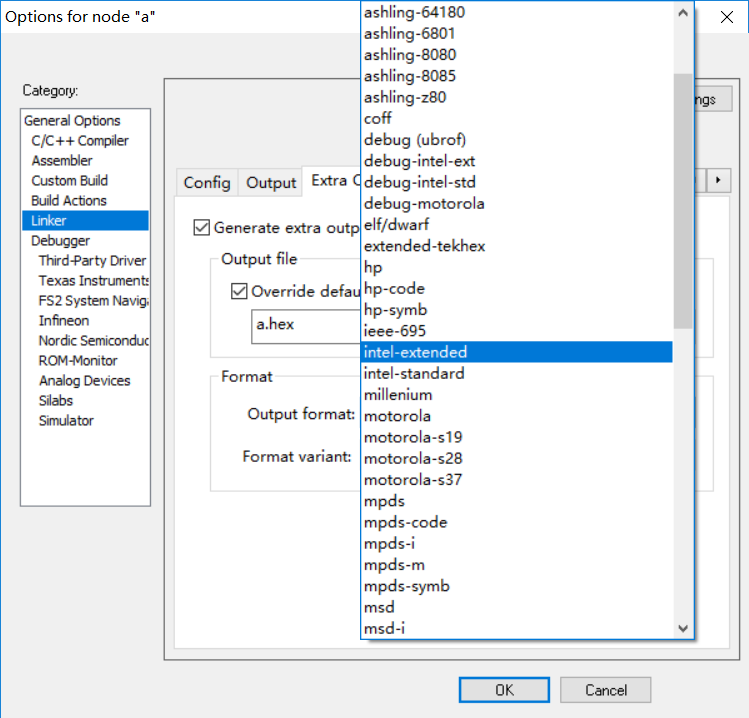
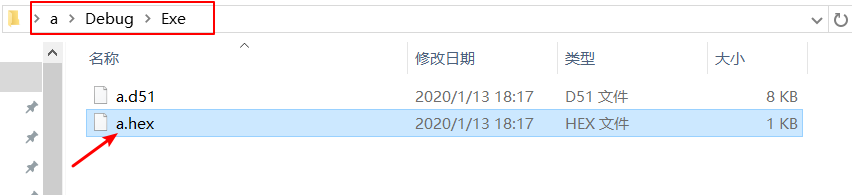
随后编译,可看见在此目录下多了一个a.hex的文件
在 SmartRF flash programmer 软件的flash image中选择到此文件,点击perform action,即可将文件烧到板子里面去


若没有本文 Issue,您可以使用 Comment 模版新建。
GitHub Issues